Stiavnica comics
This tutorial shows creating of simply comics - using curves and background image
-
Lets name this animation 'Stiavnica Square'.
Open background 'stiavnica-backgnd.bmp'. This bmp file contain scanned graphics data

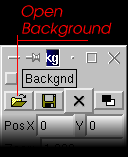
-
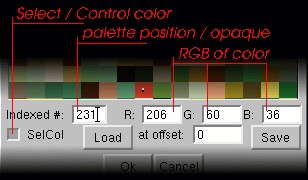
In 'File/Preferences' menu choose 'Select & Control Color'. Just choose
any two colors you would like to be used for selection and control of curves. Let set them for example to red (for selection)
and to green (for control). It will be used only for lines (curves) drawings.
-
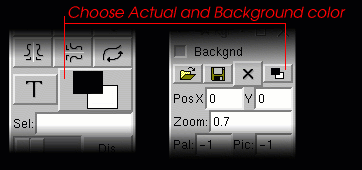
Use 'Choose colors' command to choose drawing and background colors. Background
color is used for filling the background when the background image is turned off or not present.
Lets choose actcol to black and background color to white. You can do the same in curves dialog or background dialog.
-
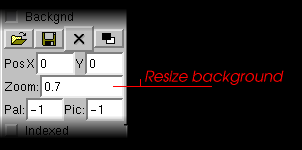
Now resize background - zoom it out. It will allow us to make some nice details later in animation. Zoom it out to 0.7 of real size.
We should resize the frame now, cause it's not necessary big. Resize it to 300x400 pixels.

-
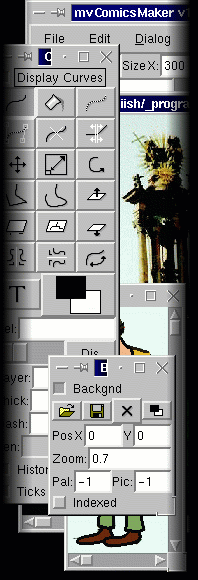
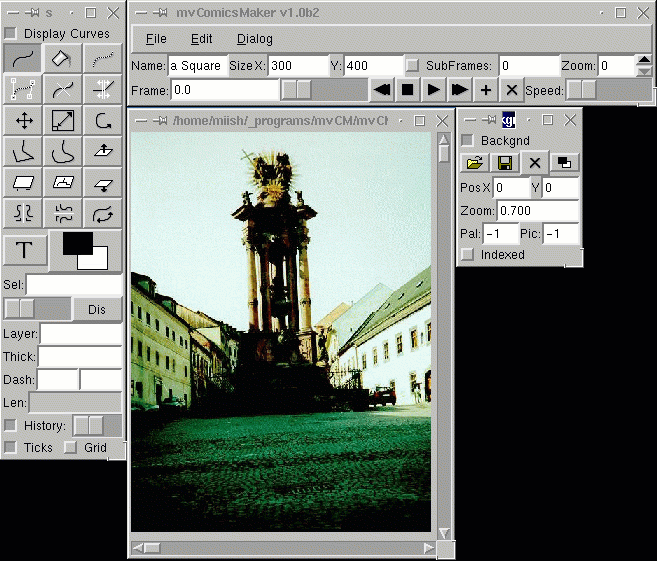
Your screen should now looks similar to next picture. Actual state in this step is saved in file 'stiavnica1.mva'.
-
Now it's the time to create some curves (vectors). At first we will create new frame, where we'll load background image with a cartoon
sketch. At first sight nothing happened - the same background is visible also in new frame. That's because mvCM automaticaly sets
background to background used in last frame. Let's go to frame #1 (created one) and load the background image - file
'stiavnica-cartoon.bmp'. You can do it same way as you loaded previous background image (see step #1). Last thing we need to do in
preparing sketch background is changing its size. Because it's very small, zoom it in to number 1.0 (same way as in step #4).

-
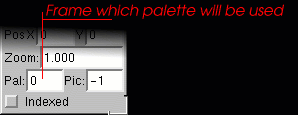
Because the cartoon, which will create will be used in first frame (frame #0), we have to require same palette as in 1st frame (now second
frame has it's own palette, which is only grayscale). If we wouldn't do this, the cartoon would has not proper colors after moving it into
first frame. (All this is not important in rgb mode). We tell to frame which palette to use very simply - into pal index we write number
of frame, whose palette will be used. After this palette won't be copied to this frame (actually, palette from this frame will be deleted),
only pointer to frame will be stored.
-
We have background sketch, which will help us to draw vector cartoon. Because cartoon is drawn with black color on white background, it's
better to change actual (drawing) color to some different, good visible - for example to yellow. You can do it same way as in step #3.
Don't be confused, if color on 'Choose colors' button won't change its color to new actual color. It's not done yet.
-
Before we'll begin with drawing, zoom the all picture. It will be easier to draw small details. Let zoom it to 10.
Now finally we can draw cartoon. We'll use the curves commands. It needs a little bit of experience and skills to do it easy. Like with
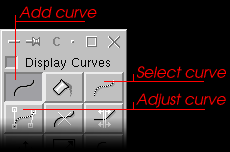
all things, the most difficult is the beggining. So, choose 'Add curve' command and draw a line according to background image.

-
After you create linear line, you need to curve it according to background. You can do it with 'Adjust curve' command. But before it, you
must select this curve. Use 'Select curve' command. After the curve is selected, it should change color to red (because we defined it like
this) and also in the list of selected curves should appear number of this curve (number 0). When the curve is selected, simply choose
'Adjust curve' command and control boxes should be displayed. Now you can change curving easily by draging boxes around. Two boxes change
position of vertices, other two boxes change curving. If you'll use right mouse button, you'll be able to drag only position boxes (that's
useful when boxes are on same place). This way you must fit line as much as possible according to background (well, if you want have it
same as background).
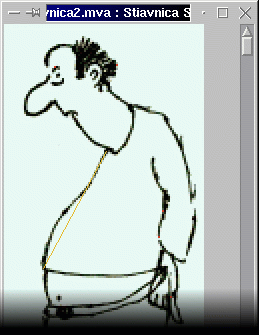
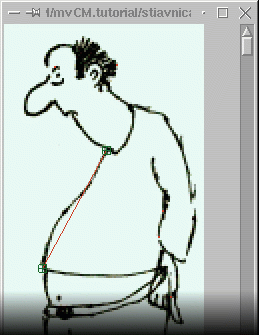
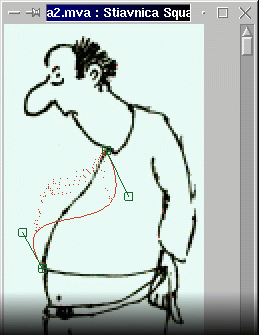
-
When you are not sure if curve is sharp enough, because it's not very good visible, press Ctrl-B. This command will hide background image.
Other pressing Ctrl-B will show background image. This way you can better see what have you done. Now we can make next line. We make it same
way - choose 'Add curve' command and draw new line. Then adjust line with an 'Adjust curve' command. At this point we should do something
more. Drag (with right mouse button) left curve's vertex over the bottom vertex of first curve. Program should ask you to weld the vertices
of lines 0 and 1. Answer 'yes'. After this when you move with any of welded vertices, also other(s) will move. mvCM allows to weld together
as many vertices as you want. After this we can make next curve - in same way. Notice, that we'll make also curves, which are not visible
in the moment (because of cartoon's left hand). That's because when we'll do animation these parts may become visible. Now don't worry if it
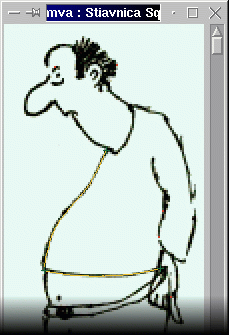
doesn't look nice. 'stiavnica2.mva'
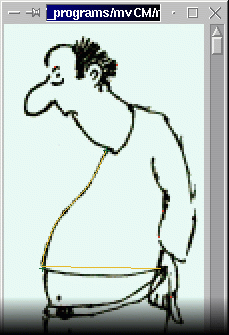

-
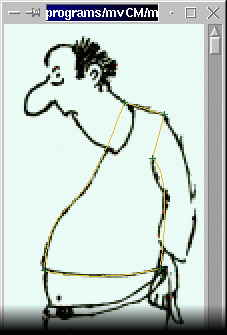
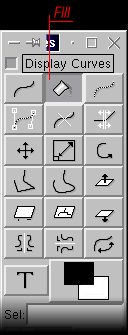
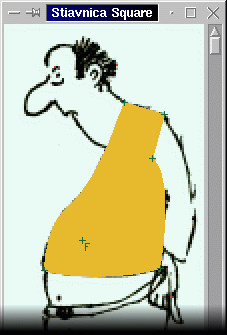
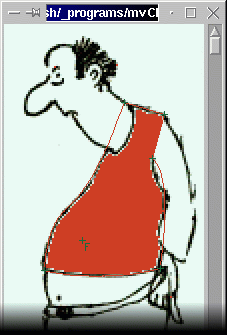
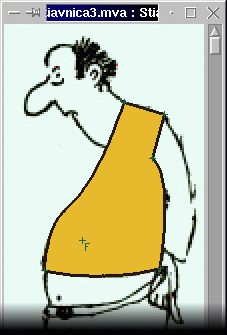
This way we'll finish body part. We can do it with 5 curves - but we must adjust also first one - move it's top vertex even higher. Make sure that all touching vertices are welded. After we have closed shape, we can fill it. Filling is also a kind of 2D vector - only position of filling point and it's color is saved. With filling we'll solve visibility problem. You must remember to this: filling is surrounded with curves in same layer, not with a background image. So choose fill command and click with a cursor somewhere in the middle of created region (it's good to choose left bottom part, cause there isn't possibility of colliding with some other picture part (for example with hand). In basic it's not a problem, but it could be chaotic, if we'd have many points in same place. The place of clicking will be marked with small letter 'F'. Notice, that this 'F' is less-more same than other vertices, so you can adjust it however you want.
-
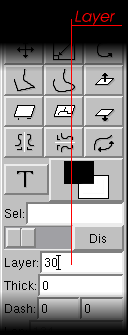
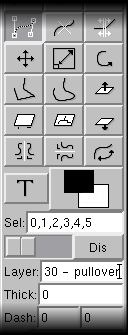
Last thing we have to do with this part of body is to move it to the other layer. Layers are good not only for visibility (always layer with the smallest number is drawn first, then bigger number ...), but also for separating parts of animation. It's clever to has each part of picture (L hand, head, R hand ...) in different layer. Later it's much more easier to make animation. When changing curve layer, first we have to choose, which curves we want to move. We make it with a same command as in step #9 - 'Select curve'. But at first press Ctrl-N, which deselects all curves. Now we could select curves in same way like before - easily select each curve and also fill. But easier way is use right mouse button to choosing any of curvess (or fill). This will select all curves (and fills) in same layer as selected curve. That's also one reason, why it's good to draw parts in separated layers - later you can easy manipulate with whatever you want. After we have selected curves we wanted to move to the other layer, we have to activate 'Adjust curve' command. The purpose of this is safety of not neccessary moving curves to the other layers. So choose 'Adjust curve' and change a layer number - for example to number 30. Right after layer number you can put name of the layer. Simply when enter there name you want - for example ' - pullover'.
-
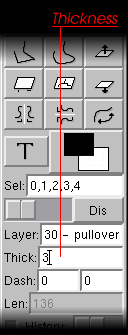
We can make the picture now nicer. Let's select all curves in layer #30 (pullover layer) - use 'Select curve' and right mouse button. Deselect fill - click with left mouse button on fill mark. Now only curves must be selected. Activate 'Adjust curve' command and change 'Thick' parameter to number 3. Right after this it vill be good change also color of curves - let set them to black color (Choose colors command). 'stiavnica3.mva'


-
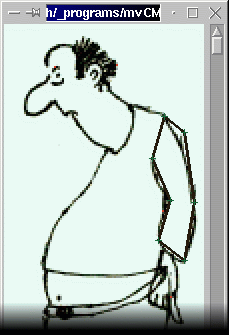
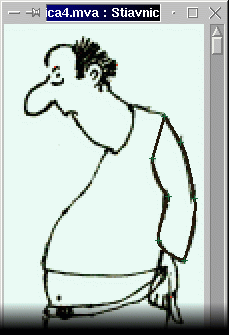
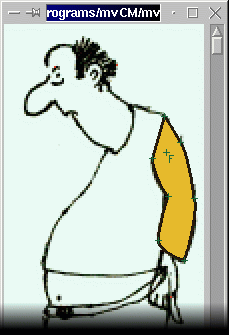
Now let's create next port of body - left arm. Previous steps was good to show you how later adjust curves descriptions. When creating curves, it's better to do it this way:
-first hide all other curves - use Ctrl-A and 'Hide curves' commands
-select desired layer, thickness and color of curves
-draw approximate shape using 'Add curve' command
-adjust and weld curves according to background picture
-change color (if needed) and fill region
'stiavnica4.mva'
-
Same way than till now we have to create other part of body. In the beggining it can be little bit tricky, but after couple minutes you shouldn't have any problem and you should proceeding fast. It's better to make more details because it's easier then make nicer animation. If you have problem select any curve, it's very easy and helpful select it by typing curve's number into 'Sel:' editline. If you have problems with welding small details, change 'Treshold' parameter in preferences. If you have any problems, you can load created cartoon from file 'stiavnica5.mva'.
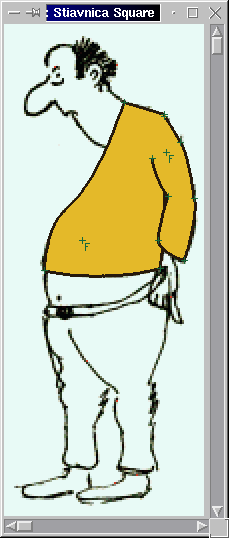
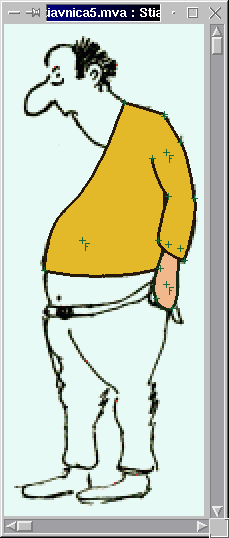
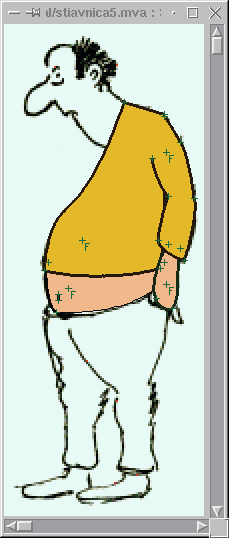
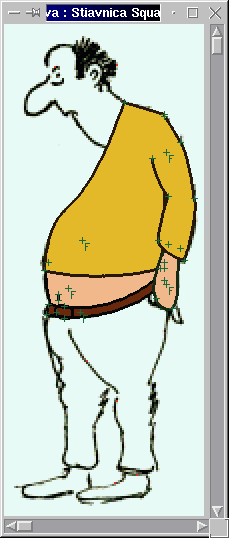
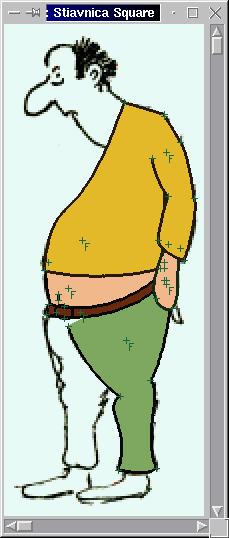
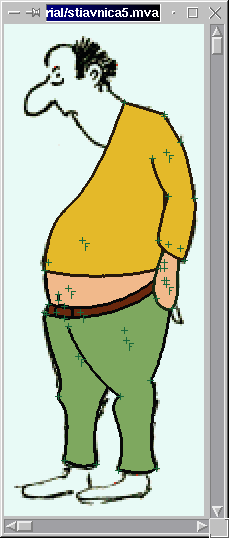

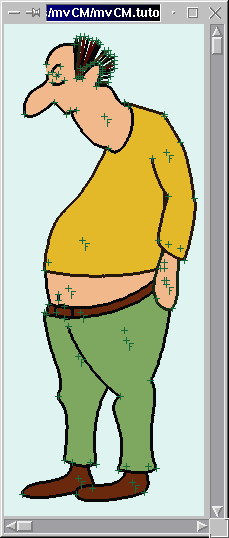
-
35 - L arm
33 - L hand
32 - pracka
31 - opasok
30 - head
29 - pullover
28 - brucho
27 - L leg
25 - R leg
23 - L foot
21 - R foot
Now we can fit created cartoon into background in the first frame. Simply select all curves by pressing Ctrl-A and then copy them into buffer by pressing Ctrl-C. Now it's clever to save created cartoon into a file (Edit/Save). Lets name it 'person1'. This way we'll slowly create database of cartoons. After saving go to the first frame a press Ctrp-P (paste). While you can still selected it, you can fit it to proper place in the picture - use 'Move curves' command, and resize it - 'Resize curves'.
-
We can make simple animation. Let's make a animation of rasing person's left hand. Go to the 1st frame and insert a new frame. New frame will be inserted after first one and background of 1st one will be automaticaly used. Copy person also into 2nd frame (Ctrl+A, Ctrl+C, then in 2nd frame Ctrl+P). Now make a move of hand. Use right mouse button for selecting all parts of body. After selecting a part use 'Move' and 'Rotate' commands to make new hand's position. Softer editing of hand can be made using 'Adjust' command. It'll be nicer, if you'll move also head little bit left. After hand is moved, a part of back which was hidden became visible. Select this part (curve 3) and use 'Curve' command to fit it into correct place. Then also select 'Adjust' command and change color of this curve to black (same as other curves).
-
Now go back to the 1st frame and set a number of 'SubFrames' to 30. This number says how many frames will be used to calculate change between 1st and 2nd frames. You can test how it would look by setting 'SubFrames' on and then displaying next frames. As you can see, animation is not very good - calculated frames are not like we need. Let's set animation somewhere in the middle (e.g. frame 0.14) and insert new frame there ('Insert Frame'). Now we can edit this new frame to make it nicer. 'stiavnica6.mva'
-
After this we can make small detail of Man's hand. Let insert a new frame at the end of the animation - after the frame 2. Show detail of background on request place. Let's set Zoom of background to 3, X position to -230 and Y position to -270. Now copy there visible part of body: go to the last frame, where still should be first created version of our cartoon. Then using right mouse button - clicking not on curve choose region which you want to copy - upper part of body. After pasting body we can zoom in it little bit. Then go to the frame 2.0, copy hand and append it into the new frame. Change it's thickness to 3. Now it's good to make some more details - let's create more detailed hand and mounth.
-
.
Guitar Amplifier
Next tutorial shows creation of simple electronic scheme -
guitar amplifier.
-
Open background 'guitar_scanned.bmp'. This bmp file contains raw
scanned graphics data.
-
In 'File/Preferences' menu choose select and control colors. Just choose
any two colors and set them for example to red (for selection) and to green (for
control). Don't care if the background picture will be damaged. It will
be used only for lines (curves) drawings.
-
Using 'Choose colors' command choose drawing and background colors. Background
color is used for background filling when the background is turned off.
Lets choose actcol to black and background color to white.
-
Using curves commands (add curve, adjust curve, select curve ...) draw
all lines. Change 'thick' parameter to propperiate value.
Dancing
Next tutorial shows creation of simple animation - dancing
steps. If anybady cares, black color represents man, blue color represents
woman.
-
Change frame size.
-
Diagram
mvCM Features
Comics
In next few lines you're be able to read (and hope also to learn) how
to create simple animation using mvCM.
STEP 1: After opening mvCM create two frames in animation. Open background
into them: tutorial_bgnd.bmp into 1st frame, tutorial_sketch into second
one. You can easily do it by pressing 'open' icon in background window.
Don't be surprised, when after opening 1st picture, the picture will be
present also in second frame. First background picture will be used in
finall animation. It's full colored picture, so we'll use it's palette.
Second one - sketch - will be used for painting comics. After opening pictures,
the size of frame is changed into pic's size. Let's change size of first
frame into 400x300 and move background 41 pixels up ('Pos Y' =-41). Second
pic is too small, so enlarge it with 'Zoom'=2. Change second's frame size
to 400x300. We well use first frame's pic as background later, so now let's
use it's palette. Give 'Pal:' equal to 0.
STEP 2: Now we can begin with painting comics. Focus at frame #1, where
the sketch background is loaded. With 'add curve' we will create new curves.
It's very recommened to create sketches in parts, which will be in the
same layer (e.g. L hand, body, tool, R hand - each in separate layer).
Later it will be good for visibility and also for easier selecting only
one part of body. In the beggining choose color of painting. There are
2 places for choosing colors - one in background window, other one in curves
window. Both possibilities are equal. Usually 'ActCol'=black and 'BGndCol'=white
is chosen. While painting, you can see your work better without background
picture (Ctrl+B).
Font Creation


